Showing posts with label project pretty. Show all posts

24 November 2013

DIY Sun-Bleached Headboard {Project Pretty}


I'm in the process of getting Will's room put together. As some of you know, we moved across base back in May to the SNCO Housing-- same style house, just a little bigger.

I juggle back and forth between an ocean/surf theme and a woodland/rustic theme. With that said, this headboard is perfect because it's versatile to fit many themes for your growing guy.
 
  
What you'll need:
(All items purchased from Lowes)


*TIP: I searched for the most beat up looking boards. I think it adds interest.


Steps:

  1. Cut all of your wood in half
  2. Line the studs at the exact distance of your bed frame
  3. Nail your six boards onto the studs. Use wood filler to hide the nail heads
  4. Stain each piece with your Sun-Bleached stain
  5. After it dries, apply a layer of white glaze
  6. Paint on your script
  7. Brush on your sealer
  8. Wait 24 hours before screwing your headboard onto your bed frame

*TIP: write your word in chalk first. This way you can see what it'll look like and make changes if necessary before you permanently add paint.

To see the adult version, click here.


Here's what we have going on in Will's room thus far. There's still so much that I want to do to his room, like paint his dresser, change the curtains, and add Euro shams.

Fact: It'll change a million times before I'm satisfied with it's final look, but I'll fill you in as I go.


I made this tee-pee and campfire set for William last Christmas, so if you're interested, I'll compile a tutorial, along with the book ledge and the yarn initial.


Happy Building!

Love, Emmie


22 July 2013

DIY Headboard {Project Pretty}

I'm finally getting around to posting our DIY headboard. We actually made this ages ago, but I wanted to wait until our bedroom was completely decorated to post the big reveal photos. However, over the months we've moved and once again, our bedroom has taken the back-burner, and it's still not complete.


For now, our headboard is finished, so I'd like to share with you on how we made it.


What you'll need: 
 (I purchased all items from Lowes)


  • two 8' stud boards (if you don't have high ceilings, you'll need to cut these down to fit your room)
  • six 1x12x8 boards (for a Queen sized bed)
  • 28 lag bolts and washers
  • Rust-Oleum Kona Wood Stain
  • Rust-Oleum Oil-Rubbed Bronze Spray Paint (for an antiqued look)
  • Drill

Steps:

  1. cut the stud boards to the height of your liking
  2. stain all of the wood
  3. lay your headboard flat on the ground
  4. drill two holes on each side of each piece of wood-- you should have a total of 4 holes/board, 24 holes total
  5. spray paint the screws and washers with the oil-rubbed spray paint
  6. carefully screw in the bolts (make sure your washer is behind the bolt) into your drilled holes. if any of your bolts are scratched, you can touch them up by using a q-tip
  7. once you move your headboard inside, take your remaining four bolts and washers, and use it to attach the headboard to your bed frame


Please note that I still need to change our lamps, and add artwork and mirrors. I'm also playing around with the idea of sewing new curtains and a duvet cover. Stick around for more bits and pieces of our bedroom makeover. 


I hope you all have a productive week, and stick around for more interior updates!

Happy Monday.

Love, Emmie


01 April 2013

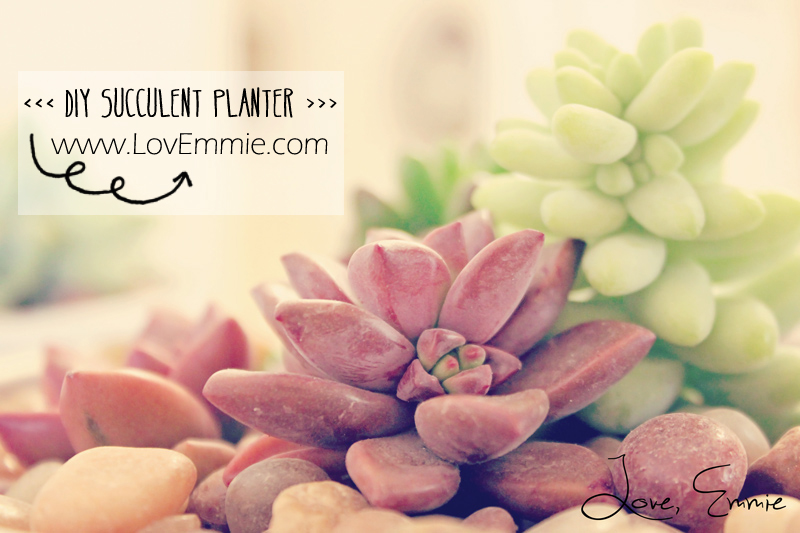
DIY Succulent Planters {Project Pretty}

I've had my windows opened almost everyday this week, with the smell of fresh air, flowering scents, and the sound of birds chirping strumming through my house. The world is awaking for it's deep winter's sleep. Nature is renewing and refreshing itself as we shift into spring. It's so delightful.

As we transition from winter to spring, I'm craving fresh flowers, fresh linen, and creamy whites. And I've really had the urge to bring a piece of spring into my home, so I decided to succulents was a great place to start. I've waiting several weeks for these cute little plants to arrive at the Lowe's Greenhouse, so I'm really excited to share my weekend project with you.

Here they are-- DIY Succulent Planters.


What you'll need:

  • Succulents (all shapes and colors. there are so many to choose from. go wild.)
  • Clay Pots
  • Dirt 
  • Gravel
  • Paint
  • Stencil 
  • Paint Brush
  • Paper Towel (optional)
  • Cup

 
 1. gathering supplies. lay everything out so it's easy to reach /// 2. pour a little paint inside your cup. dilute your paint with water. this will give you a "white wash" look /// 3. paint your pots. if you applied too much paint, you can wipe some off with your paper towel


4. & 5. with your stencil, add numbers, letters, or words to your pots. I used my oil paints which took a week to dry. cheap craft paint would work a lot better /// 6. & 7. fill your pots with dirt and arrange your succulents. pack them in for a more dramatic look /// 8. not shown, but add your gravel and water your plants well


Happy Planting!

Emmie


17 January 2013

DIY Picture Frame {Project Pretty}

Krysta said to me, "Mom, I'm ready for a bigger girl's room. Not a teenager room, but something a little bigger than what I have now."

I was shocked because Krysta NEVER wants change. In fact, I still have a few of her toddler toys and dresses that she insists on keeping, but yet she never plays with anymore. Since she wants a "somewhat kinda sorta, but not really a teenager room", I'm letting her take the reigns as far as picking out the colors and fabric.

Her colors: gold, silver, white, turquoise, and fuchsia. It sounds a little bizarre, but it's coming together really well. We've been working on her room with any small pockets of time that we can muster together.

I'll post each DIY project that we add to her room and once it's complete I'll do a grand reveal with links to where certain items can be purchased and/or made.

So for now, I'll start with the focal point of her room.... the GRAND WHITE HORSE PHOTOGRAPH. The white horse photograph can be purchased from Art.com . Because we wanted to fill a large space with dramatic art, we opted for the 56x42. Since the piece is insanely large, professionally framing would have cost us an arm and a leg, possibly even our firstborn.... so we did what any DIYer would do-- built our own frame.

photograph on Art.com

Supplies:
  • modpodge
  • foam brush
  • wood glue
  • nails
  • 4 furring strips $1 each at Lowes
  • 1/8 inch plywood $13/sheet at Lowes
  • molding (I needed 3 strips because of the large size, so just measure how much you need.) I used "Sunburst" from Lowes. It's about $18/strip, but you can opt out for something cheaper-- this was the one of the pricier strips, but I just really like the detail on the "sunburst" molding.  
  • clamps
  • spray paint or regular paint

Total framing cost: $73 (please note: your cost depends on the size of your photograph and the style of your molding)


Steps:

1. Build the backside of your frame with the furring strips according to the size of your photograph. Add enough to each side to allow room from your molding to be sturdy on the plywood, but small enough to have a little overhang. Example: if your photograph is 8"x10", your molding is 2", make your frame roughly 9.5"x11.5".

2. Wood glue the ends and nail together. See photo below:


3. Wood glue your plywood to your frame. Clamp it down till the glue dries, preferably overnight.

4. Using a foam brush, apply modpodge to your plywood and smooth your photograph on top. I started in the middle and worked my way out-- I found that to be the easiest.

5. Next, Modpodge the top of your photograph for a glossy look and to protect it.

6. Cut each edge of your molding in 45* angles. Wood glue the edges together, again preferably overnight for maximum hold. Spray paint the molding to the color of your choice-- I choose silver.

7. Wood glue your "frame" to the top of your plywood. Clam down, so it's nice and tight.
Details: 


8. Attach hardware to the back sides (not the top) AND YOU'RE DONE!


Shown displayed in Krysta's room:


Happy Creating!!!

Em


22 March 2012

Spring Wreaths {Project Pretty}


Welcome to another edition to Project Pretty.

This week’s project was inspired by Chelsey from The Paper Mama. She created a fantastic FREE printable full of does and toadstools in various sizes, along with a floral bunting banner –perfect for adding a bit of whimsy and spring to your home. This project also went perfectly with our Little Red Riding Hood party.
While Chelsey made really cute terrariums, I decided to transform the three wreaths in my hallway bathroom. If you remember, I made these moss wreaths back in December, so all I had to do was add the printable does and swap out the ribbon.

Basically all you need is a wreath form from any local craft store, a package of moss, and a hot glue gun.

  • Begin by hot gluing your moss around the wreath form, little by little until your entire wreath looks like a blanket of moss.
  • Cut out your printable (I printed two sheets for three wreaths).
  • Hot glue toothpicks to the backside (this with be your “floral pick”)
  • Click here for The Paper Mama’s detailed instructions. 
  • For ribbon, I actually used natural unbleached muslin that I ripped into strips and very loosely tied into floppy knots –this way gives it more of a whimsy, carefree feel. 
  • Hang and voila!


Happy Spring and Happy Crafting,

Em

01 March 2012

Little Red Riding Hood and the Big Bad Wolf {Project Pretty}

Welcome to another edition of "Project Pretty."

We previously celebrated Krysta and William’s birthday with a “Little Red Riding Hood and the Big Bad Wolf” theme. I loved how all of the decorations transformed our ordinary home into a cozy woodland --perfect for all of our Reds’ and Wolves. While I’m anxious to tell you about our big day, I thought I’d share the break down on how I created various elements of the themed décor.


For Red Riding Hood photos, click here

Here is the overview of the dining area.

I filled this area with moss, wildlife, colorful ribbon, and lots of wood slices.


tablecloth: 4 yards of natural burlap, tied with twine --no sewing needed
terrarium: filled 1/4 with various moss, displayed with woodland creatures
toadstools + blue birds: sculpted from polymer clay. bake at 325ish for around 10-20 minutes.
table wreath: all supplies from Hobby Lobby (tutorial below)
evergreen trees: Hobby Lobby Christmas clearance
table centerpiece: all from Lowes --Dusty Miller planted in tiny clay pots. given to each kid
cupcake + cake display: supplies from Hobby Lobby (tutorial below)
bunting banner: Sweet Pea Fabrics on Etsy (tutorial below) 
mason jars: chocolate cookie mix in a jar. fabric here, recipe here. given to each family. 


 Krysta's Cake

regular vanilla cake mix. I added fresh strawberries to each layer.
cream cheese frosting recipe, here


for embellishments, I used a floral bird and butterflies from Hobby Lobby. I added red gingham ribbon at the base of the two layers. cake is displayed on a wood slice.

 
William's Cake

regular chocolate cake mix. I added 3/4 of chocolate chips and one box of chocolate pudding.
cream cheese frosting recipe, here.


for embellishments, I used food coloring to coconut for "grass" and added a blue and white polkadot ribbon at the base. I then added moss balls and a wooden squirrel figurine from Hobby Lobby, all placed on a wood slice.


{Tutorials}


 cupcake stand

use one large wood slice and two smaller slices.
three dowel robs, cut in half to use as your dividers. attach with WOOD GLUE.
with hot glue, place moss around the robs.
for embellishments, you can add butterflies, birds, bees, etc


Bunting Banner

base--

cut fabric into triangles
hot glue yard or ribbon to the FRONT


letters--


with felt, cut out your letters (I printed my letters from my computer to use as a pattern)
thread string around the edges of each letter
hot glue the letter onto each triangle (this will prevent string fly-aways from the back)


 wreath centerpiece

start with an extra large grapevine wreath form, hot glue Spanish moss randomly around the wreath and add berries or flowers.
attach various patterned and colored ribbon to the backside of the wreath.

OPTIONAL: add birds and small decorative items (very lightweight) to hang from the ribbon to add interest.


Front Door Wreath

I love the idea of a themed wreath to greet you at the front door. It helps set the mood of the event.

medium sized grapevine wreath. hot glue reindeer moss partially around the wreath.
add miniature bunting banner made from ribbon and attached with fishing line.
I added a Red Riding Hood (McDonald toy bought from Amazon for $1.50) and a wolf figurine. 


That just about wraps up the how-to's from our Little Red Riding Hood and the Big Bad Wolf birthday party. Come back next week for another "Project Pretty."

Happy Crafting,

Emmie