31 December 2013

Our Happy Place

There’s this little sliver of beach that fills my cup to the rim. It’s a place where an ombre' turquoise sea rolls among milk powdered sand and around rocky mountains; it’s a place where palm trees sway in the wind and the happiest of memories are made. This spot is a special place where our imaginations run wild, where our inner child is awakened, and our dreams become a reality.

William has coined this happy place as “Mimi’s Beach”. And it’s true-- it’s ours because we make it our own. We pump our hearts full of adventure and we spread it across our tiny patch of heaven.


Not a moment is wasted on the island. Even when we’re starring off into the blue, we’re living with purpose. We live for each other, we live for our togetherness, and we live for making memories. Our smiles are permanent, our hearts are open, and we’re at peace.

 My cup runneth over.


drawing hearts on trees. big love.


Here are photographs of our happy place: It's just too sweet for words...


 sea glass

I found this while "nature collecting" with William. My plan is to take into a jeweler to turn into a necklace for Krysta. 


These. These magic moments will live forever in our souls.

Love, 

Emmie


28 December 2013

From Our Home to Yours

With the New Year approaching just around the corner, I'd like to wish you all a Very Merry Christmas, a Happy New Year, and a Fantastic Hanukkah from our home to yours.

"Christmas...is not an external event at all, but a piece of one's home that carries in one's heart." -Freya Stark

Love, Emmie


11 December 2013

Knee Deep in the Trees Somewhere

***A post from my husband on a father-daughter outing***

I spent my teenage years in Colorado, so hiking is a fairly normal activity for me. Little did I know, Hawaii takes hiking to a new level.

Em's Mom's Roommate (say that one 3 times fast!) Dan took Krysta and I for an early morning hike, and I was definitely surprised at the technicality of it. No beaten, graveled paths here. The only way you knew you were going the right way was the occasional pink ribbon tied on a tree limb. If that isn't enough, the trail was full of creek crossings, tree roots, lush foliage and of course: mud. Not your every day mud either, mind you. This was the sticky, gacky, mucky goop kind of mud.

The biggest surprise of the day, however was Krysta. My dainty, fragile, little princess was out there climbing, hopping, slipping, sliding and balancing her way through the trail with the best of them. Even when we scaled vertical rock faces with naught but a ragged old rope someone left behind, that girl kept her game face on for the whole 5.25 miles!

And man, was it worth it. All of our hard work, and my and Dan's aching bones was rewarded with some of the best scenery and most lush bits of rain forest I could have ever imagined. And then we made it to the waterfalls.

All in all, I consider this day one of the best from the whole trip, and I'll never forget it.

I don't have any photos from the hike, but here are a few that we took while snorkeling after our hike:


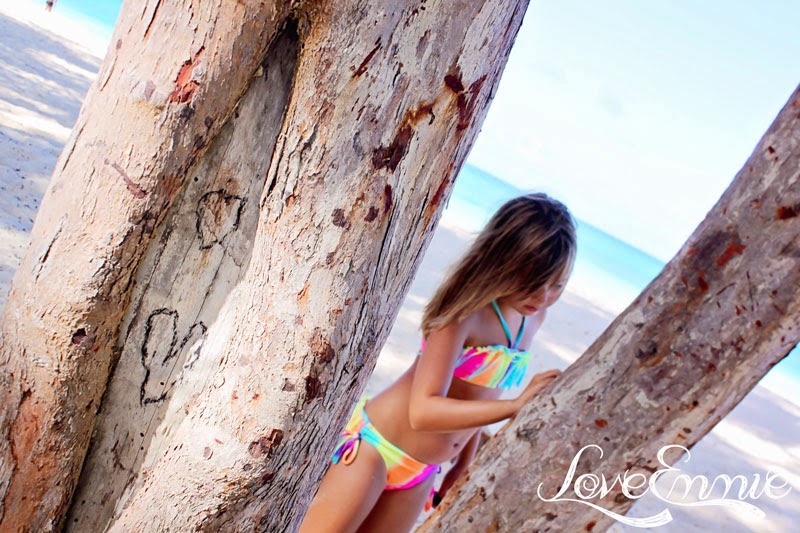
Meanwhile on land, Em, Mom, and Will lounged in the sun:


More to come.
Stay tuned.

Love, Emmie

24 November 2013

DIY Sun-Bleached Headboard {Project Pretty}


I'm in the process of getting Will's room put together. As some of you know, we moved across base back in May to the SNCO Housing-- same style house, just a little bigger.

I juggle back and forth between an ocean/surf theme and a woodland/rustic theme. With that said, this headboard is perfect because it's versatile to fit many themes for your growing guy.
 
  
What you'll need:
(All items purchased from Lowes)


*TIP: I searched for the most beat up looking boards. I think it adds interest.


Steps:

  1. Cut all of your wood in half
  2. Line the studs at the exact distance of your bed frame
  3. Nail your six boards onto the studs. Use wood filler to hide the nail heads
  4. Stain each piece with your Sun-Bleached stain
  5. After it dries, apply a layer of white glaze
  6. Paint on your script
  7. Brush on your sealer
  8. Wait 24 hours before screwing your headboard onto your bed frame

*TIP: write your word in chalk first. This way you can see what it'll look like and make changes if necessary before you permanently add paint.

To see the adult version, click here.


Here's what we have going on in Will's room thus far. There's still so much that I want to do to his room, like paint his dresser, change the curtains, and add Euro shams.

Fact: It'll change a million times before I'm satisfied with it's final look, but I'll fill you in as I go.


I made this tee-pee and campfire set for William last Christmas, so if you're interested, I'll compile a tutorial, along with the book ledge and the yarn initial.


Happy Building!

Love, Emmie